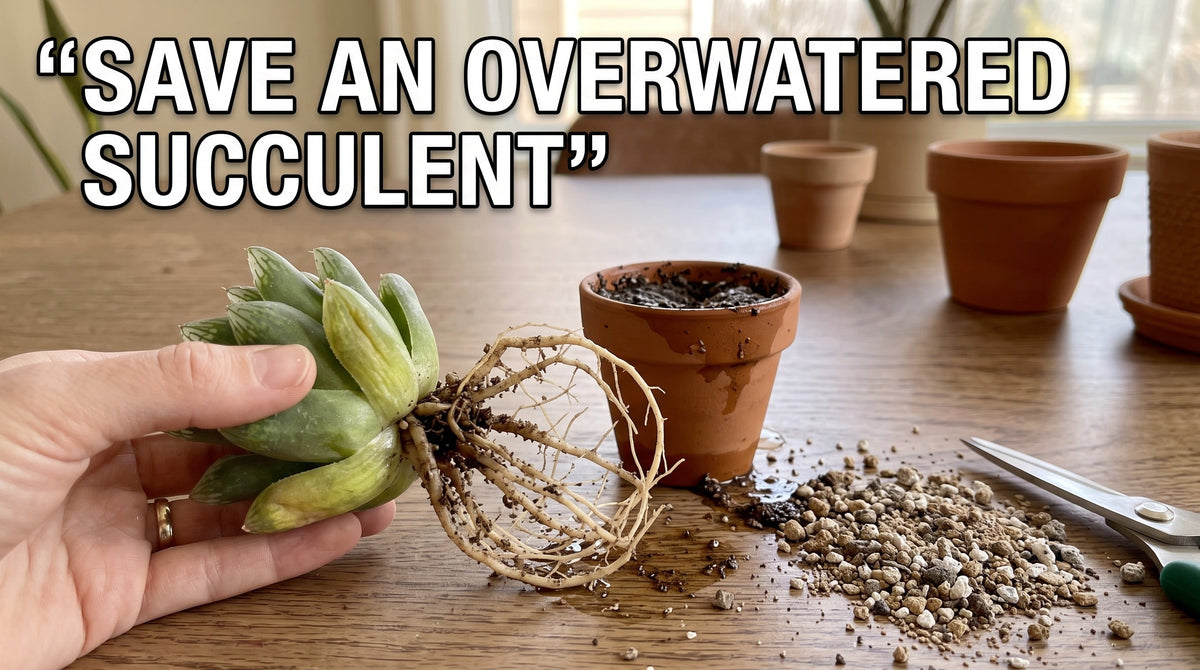
How to Save an Overwatered Succulent: Step-by-Step Guide
Overwatering is one of the most common problems succulent growers face.
Succulents are designed to store water in their leaves, stems, or roots, so they generally need less frequent watering than many other houseplants. When the soil stays wet for too long, however, the roots may begin to deteriorate, especially when drainage is poor.
The good news is that an overwatered succulent is not always a lost cause.
If you notice soft leaves, yellowing, a collapsing stem, or soil that remains wet for an unusually long time, it is worth checking the plant before the problem becomes more severe.
This step-by-step guide will show you how to identify an overwatered succulent, inspect the roots, remove damaged tissue when necessary, repot the plant, and adjust your care routine to reduce the chance of future problems.
What Does an Overwatered Succulent Look Like?
The first step in saving an overwatered succulent is recognizing the warning signs.
One symptom alone does not always prove that a plant has been overwatered. Succulents can respond to several environmental problems in similar ways.
However, a combination of symptoms can provide a useful clue.
Common signs of overwatering include:
-
Leaves becoming soft or mushy
-
Yellowing leaves
-
Leaves dropping more easily than usual
-
A swollen or waterlogged appearance
-
A stem becoming soft near the soil line
-
Soil remaining wet for an unusually long time
-
A musty or unpleasant smell from the growing medium
-
Roots that appear dark, soft, or mushy when inspected
Healthy succulent leaves are typically firm for their species. If the plant suddenly becomes soft while the soil remains consistently wet, overwatering should be considered.

Why Does Overwatering Damage Succulents?
Succulents store water as an adaptation to dry conditions, so their roots generally do not need to remain surrounded by constantly wet soil.
When growing media stay saturated for extended periods, the root environment can become unfavorable. Poor drainage makes the problem worse because excess water has nowhere to go.
University of Minnesota Extension recommends well-drained growing media and containers with drainage holes for succulents, noting that excess water trapped in soil can lead to rot and decay.
This is why watering frequency alone does not tell the whole story.
A succulent watered once a week in a fast-draining pot may have a very different experience from a succulent watered once a week in a large container filled with moisture-retaining soil.
The combination of water, soil, pot size, drainage, light, temperature, and plant type all matter.
Step 1: Stop Watering and Assess the Plant
If you suspect your succulent has been overwatered, do not immediately add more water.
First, assess the plant and its growing environment.
Check the soil several inches below the surface if possible. Look at the drainage hole and make sure water can actually escape from the container.
If the pot is sitting inside a decorative cachepot or saucer, check whether excess water has collected underneath it.
Remove standing water so the plant is not sitting in it.
Next, inspect the leaves and stem.
Are the leaves simply a little softer than usual, or are they becoming translucent, mushy, and detached?
Is the stem firm, or does it feel soft near the soil line?
These observations will help you decide whether the plant needs simple drying time or a more thorough intervention.
Step 2: Remove the Succulent From the Pot
If the soil is staying wet and the plant shows significant signs of decline, carefully remove it from the container so you can inspect the roots.
Do not pull the succulent forcefully by its leaves.
Instead, support the plant while gently loosening the container and root ball.
If the pot is flexible, gently squeeze the sides.
If it is rigid, carefully work around the inside edge if possible.
Let the root ball come out gradually.
The goal is to disturb the plant as little as possible while giving you access to the root system.
If the plant has spines, use appropriate protection when handling it.
Step 3: Inspect the Roots
Once the succulent is out of the pot, gently remove enough old growing medium to see the roots.
Healthy roots can vary in color depending on the plant, so do not judge them by color alone.
Pay particular attention to texture.
Roots that are firm and intact are generally more encouraging than roots that are soft, mushy, or breaking apart.
Root rot can occur when roots remain excessively wet, and badly affected roots may become dark and mushy.
If the root system is mostly firm and healthy, the plant may simply need improved drainage and a better watering routine.
If you find extensive soft or decaying tissue, continue with the next steps.

Step 4: Remove Damaged Roots
If you identify roots that are clearly dead or rotting, use clean, sharp scissors or pruning shears to remove the affected sections.
Work slowly.
Do not cut healthy roots simply because they look different from what you expected.
The objective is to remove obviously damaged tissue while preserving as much healthy root material as possible.
Clean your cutting tool before and after working on the plant.
If the stem itself has become soft or rotten, the situation is more serious.
In some cases, healthy tissue above the damaged area may be used for propagation, depending on the succulent species and the extent of the damage.
However, do not assume every severely rotted plant can be saved.
Step 5: Let the Plant Dry if Necessary
After removing damaged roots, allow the affected areas to dry before placing the plant into fresh growing medium when appropriate.
This is especially important if roots or stems were cut during the rescue process.
Avoid placing freshly cut, damaged tissue immediately into a saturated growing medium.
The exact recovery approach depends on the species, the severity of the rot, and whether the stem has also been affected.
The important principle is to avoid recreating the same wet conditions that caused the original problem.
Step 6: Prepare a Well-Draining Pot
Choose a clean container with a drainage hole.
Do not automatically move the succulent into a much larger pot.
A larger container contains more growing medium, which can hold moisture for longer and make it harder to judge how quickly the soil is drying.
University of Minnesota Extension recommends only modest increases in pot size when repotting houseplants and notes that overly large containers can contribute to root problems.
Choose a pot that is appropriate for the size of the remaining root system and the plant itself.
The container should also be stable enough to support the succulent.
Step 7: Use Fresh, Well-Draining Soil
Do not put a recovering succulent back into old, waterlogged soil.
Use a fresh growing medium that drains well and provides enough airflow around the roots.
Succulents generally perform best in porous, well-drained growing media rather than heavy soil that stays wet for long periods.
The exact mix can vary by species and growing conditions, but the goal is consistent:
Water should be able to move through the container rather than remaining trapped around the roots.
Avoid placing a layer of gravel at the bottom of a pot as a substitute for proper drainage.
The entire growing medium should be appropriate for container growing and the particular succulent.
Step 8: Repot the Succulent Carefully
Place the succulent into the prepared pot and position it at an appropriate depth.
Do not bury the stem or lower leaves unnecessarily.
Add fresh growing medium around the roots and gently stabilize the plant.
Avoid packing the soil down aggressively.
The roots need access to air as well as moisture, so excessively compacting the growing medium can work against the goal of improving drainage.
If you want a more detailed guide to the physical repotting process, see our guide on how to repot succulents without damaging their roots.
Step 9: Give the Plant Time to Recover
After repotting, resist the temptation to make lots of changes at once.
A recovering succulent needs stable conditions.
Place it in a bright location appropriate for its species, while avoiding sudden environmental changes.
If the plant was previously kept in low light, do not immediately move it into intense direct sunlight simply because it has been repotted.
Sudden changes in light can add another source of stress.
Once the plant is stable, you can gradually adjust its light exposure as needed.
Step 10: Reconsider Your Watering Routine
One of the most important parts of saving an overwatered succulent is changing the conditions that caused the problem.
Do not automatically return to the same watering schedule after the plant recovers.
Instead, pay attention to the growing medium and the plant's environment.
Succulents generally benefit from allowing the growing medium to dry between waterings, although the exact timing varies by species, season, container, soil, temperature, and light.
University of Minnesota Extension recommends allowing succulent soil to dry completely between waterings and watering thoroughly when it is time to water.
Rather than watering because it is “Tuesday” or because a certain number of days have passed, check the plant and growing medium.
Water thoroughly when appropriate, then allow excess water to drain freely.
Do not allow the plant to sit in standing water.

How Long Does an Overwatered Succulent Take to Recover?
There is no single recovery timeline.
A mildly stressed succulent may begin looking better after its growing conditions improve.
A plant with significant root damage may take much longer.
Recovery depends on how much healthy root tissue remains, the species, environmental conditions, and how quickly the original problem was corrected.
Do not judge recovery solely by the appearance of the leaves during the first few days.
Instead, look for gradual signs of stability.
The plant may stop losing leaves, remain firm, or eventually produce new healthy growth when conditions are suitable.
Why Is My Succulent Still Dying After I Stop Watering?
Simply stopping watering does not always solve an overwatering problem.
If the growing medium remains wet, the pot lacks drainage, or the roots have already been severely damaged, the plant may continue to decline.
Other environmental problems can also produce symptoms that resemble overwatering.
For example, inadequate light, temperature stress, pests, physical damage, or species-specific watering needs may contribute to poor growth.
That is why inspecting the roots and growing environment can be more useful than changing the watering schedule alone.
Common Mistakes When Saving an Overwatered Succulent
Mistake 1: Watering again because the leaves look wilted
A succulent can look stressed even when the soil is already too wet.
Always check the growing conditions before adding more water.
Mistake 2: Keeping the plant in wet soil
If water cannot drain away, simply waiting without correcting the container or growing medium may not solve the underlying problem.
Mistake 3: Using a much larger pot
A large container can retain more moisture and make drying slower.
Choose an appropriately sized pot instead.
Mistake 4: Reusing saturated, degraded soil
If the old growing medium is staying wet and contributing to poor drainage, replacing it with a suitable fresh mix may be more appropriate.
Mistake 5: Cutting every root
Do not aggressively prune healthy roots.
Remove clearly damaged tissue while preserving healthy roots whenever possible.
Mistake 6: Moving the plant into intense sunlight immediately
A stressed plant may not benefit from several major environmental changes at once.
Provide suitable light and make significant changes gradually.
Mistake 7: Expecting instant recovery
Root damage takes time to overcome.
Focus on creating stable conditions rather than repeatedly disturbing the plant.
How to Prevent Overwatering in the Future
Prevention is easier than repeatedly rescuing a stressed succulent.
Start with the container.
Make sure it has a functional drainage hole and that excess water can escape.
Next, use an appropriate growing medium.
Avoid heavy soil that stays saturated for long periods.
Then consider the environment.
Light levels, temperature, humidity, pot material, plant size, and season can all affect how quickly the growing medium dries.
Finally, change the way you think about watering.
Instead of following a rigid calendar, check the growing medium and the condition of the plant.
When it is time to water, water thoroughly enough to moisten the growing medium and allow excess water to drain away.
Then let the soil dry before watering again.
This approach is more flexible than applying the same number of days between every watering.
Can You Save a Succulent With No Healthy Roots?
A succulent with extensive root loss has a more difficult recovery path, but the answer depends heavily on the species and whether healthy stem or leaf tissue remains.
Some succulents can be propagated from healthy leaves, stems, or offsets.
If the root system is completely compromised but the upper plant remains healthy, propagation may sometimes be an option.
However, propagation methods vary considerably between succulent types.
Do not continue watering a severely damaged plant simply because you hope new roots will appear.
Instead, assess whether healthy plant tissue remains and choose an appropriate propagation method for that species.
A Simple Overwatered Succulent Rescue Checklist
If you need a quick reference, follow this checklist:
-
Stop watering.
-
Check whether the soil is staying wet.
-
Make sure the drainage hole is working.
-
Remove the succulent carefully if the problem appears significant.
-
Inspect the roots.
-
Remove clearly rotten or dead roots with clean tools.
-
Remove affected stem tissue when necessary.
-
Allow damaged areas to dry when appropriate.
-
Prepare a clean pot with a drainage hole.
-
Use fresh, well-draining growing medium.
-
Repot the succulent at an appropriate depth.
-
Place it in suitable light.
-
Avoid sudden environmental changes.
-
Resume watering only when the plant and growing medium are ready.
-
Adjust your long-term watering routine to prevent the problem from returning.
Final Thoughts
Learning how to save an overwatered succulent starts with understanding that more water is not always the solution.
When succulent soil remains wet for too long, roots can become damaged, especially when drainage is poor.
The most important steps are to stop adding water, inspect the growing environment, check the roots when necessary, remove clearly damaged tissue, provide fresh well-draining soil, and use a container that allows excess water to escape.
Recovery may take time, and not every severely damaged succulent can be saved. But catching the problem early can give the plant a much better chance.
Once your succulent is stable again, focus on prevention. Give it appropriate light, use a suitable growing medium and container, and let the soil dry appropriately between waterings.
Healthy succulent care is less about watering on a fixed schedule and more about learning to read the plant, soil, pot, and growing environment together.