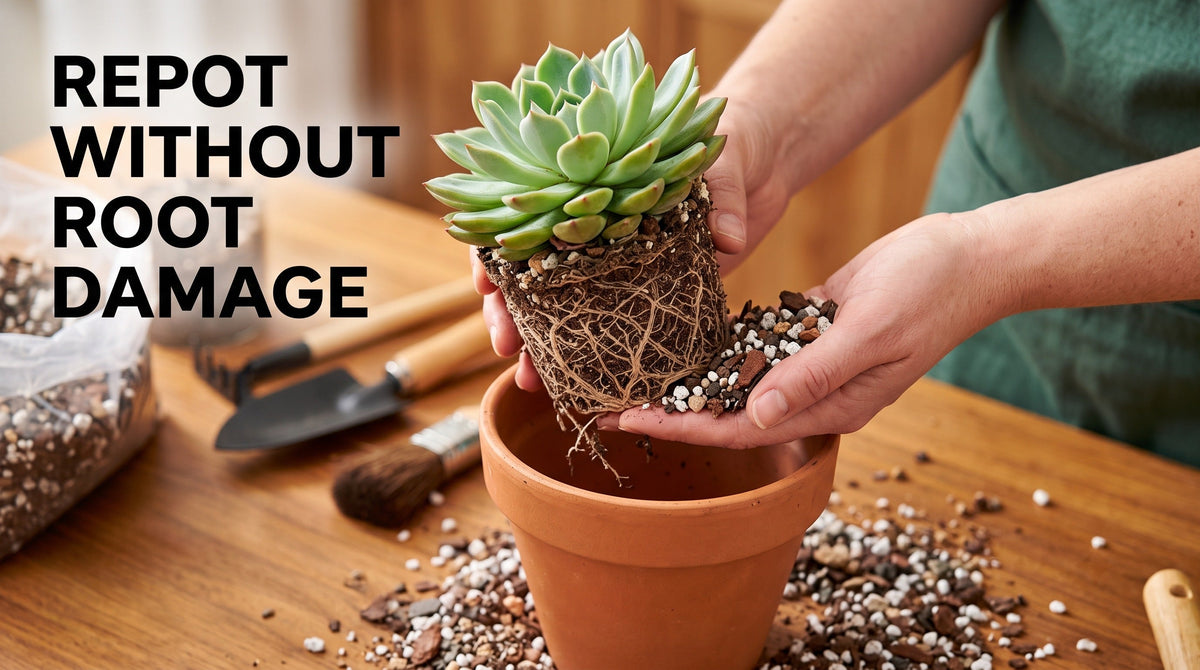
How to Repot Succulents Without Damaging Their Roots
Repotting a succulent may look simple, but one careless pull can damage delicate roots, break leaves, or stress the entire plant. The good news is that you do not need to be an expert gardener to repot succulents safely.
With the right pot, well-draining soil, and a gentle technique, you can move your succulent into a new container while protecting as much of its healthy root system as possible.
Repotting is not something every succulent needs frequently. Many succulents can remain in the same container for a long time. However, repotting can become useful when a plant has outgrown its container, the soil has broken down, drainage has become poor, or the plant has become unstable.
This guide will show you how to repot succulents step by step, how to remove them without pulling on the roots, how to check the root system, and what to do after repotting.
Why Do Succulents Need to Be Repotted?
Succulents generally prefer being slightly snug in their containers rather than sitting in an oversized pot.
Over time, however, the growing medium can break down and become less effective at draining excess moisture. A growing succulent may also become too large for its current container or become top-heavy and unstable.
Repotting gives you an opportunity to refresh the growing medium, check the roots, improve drainage, and move the plant into a more suitable container.
You may want to consider repotting if:
-
The plant has clearly outgrown its container.
-
Roots are becoming crowded or growing through the drainage hole.
-
The soil stays wet for too long.
-
The growing medium has become compacted or degraded.
-
The plant is unstable in its current pot.
-
The container no longer provides enough room for the root system.
-
You need to inspect the roots because the plant is showing signs of stress.
The goal is not simply to give your succulent a larger pot. The goal is to create a healthier root environment.
When Is the Best Time to Repot Succulents?
Timing can make the process easier for both you and your plant.
For many succulents, repotting during an active growth period is a practical choice because the plant can recover and begin establishing itself in its new container.
Avoid repotting simply because a calendar says it is time. Instead, consider the condition of the plant, its growth cycle, the condition of the soil, and whether the current container is still appropriate.
If your succulent is healthy and comfortable in its current pot, there may be no reason to disturb it.
Before repotting, it is also useful to make sure the plant has enough light for healthy growth after the move. Light conditions influence how actively succulents grow and how quickly their growing medium dries.
If you are unsure about the best lighting position after repotting, see our guide on how much sunlight succulents need for a better understanding of bright light, direct sun, indoor windows, and gradual acclimation.
Choose the Right New Pot
One of the most common repotting mistakes is choosing a container that is much too large.
A large pot holds more soil, and more soil can retain moisture for longer. For succulents, that can create an unnecessarily wet environment around the roots.
Instead, choose a container that is only slightly larger than the existing root system.
Look for a pot that:
-
Has a drainage hole.
-
Is only moderately larger than the current container.
-
Provides enough room for the roots to spread naturally.
-
Is stable enough to support the plant.
-
Works well with the size and shape of the succulent.
A drainage hole is especially important because excess water needs a way to escape from the container.
Terracotta can also be a useful choice for many succulent growers because its porous material can allow moisture to evaporate more readily than some glazed containers.
Prepare the Soil Before You Start
Use a well-draining growing medium designed for succulents and cacti, or create a suitable mix using ingredients that provide good drainage and airflow.
Avoid using heavy garden soil by itself in a container.
Before you remove the succulent from its old pot, prepare the new container and soil so the plant does not have to sit exposed longer than necessary.
Place enough growing medium in the bottom of the new pot so that the succulent will sit at approximately the same depth as it did previously.
Do not bury the stem or lower leaves deeper than necessary.
How to Remove a Succulent Without Damaging the Roots
This is the most important part of the process.
Never grab the succulent by its leaves, stem, or rosette and pull it forcefully out of the pot.
Instead, support the plant and container carefully.
If the container is flexible, gently squeeze or massage the sides to loosen the root ball.
For a rigid container, gently work around the inside edge if possible. Turn the container carefully while supporting the plant with your other hand.
The objective is to loosen the root ball rather than pull the plant away from it.
Once the root ball begins to slide out, let it come free gradually.
Do not yank the plant if it does not move immediately.
For small or delicate succulents, working slowly is usually much safer than trying to remove the plant in one quick movement.
If the plant has spines, use folded paper, thick gloves, or another safe method to protect your hands while handling it.

Inspect the Roots Carefully
Once the succulent is out of its container, take a moment to inspect the root system.
Healthy roots can vary in appearance depending on the species, so avoid removing roots simply because they do not look exactly the way you expected.
Look for obvious signs of damage, decay, or dead material.
If the root system is tightly tangled, gently loosen only what is necessary.
You do not need to completely remove every piece of old soil.
The less unnecessary disturbance you cause, the better.
If you find damaged or obviously unhealthy roots, use clean, sharp scissors or pruners to remove only the affected sections.
Avoid aggressively cutting healthy roots just to make the root ball look neat.
The purpose of root pruning is to address damaged or problematic tissue, not to reduce a healthy root system unnecessarily.

How to Loosen a Root-Bound Succulent
Sometimes a succulent has been growing in the same container for a long time and the roots become densely packed.
If the roots are circling tightly around the outside of the root ball, gently work them apart with your fingers.
Do not pull aggressively.
Start at the outer edges and gradually loosen compacted areas.
If the roots are extremely crowded, you may need to remove a small amount of the outer compacted material. Work carefully and preserve as much healthy root tissue as possible.
Remember that succulents generally do not need a huge amount of root space.
A slightly snug container with excellent drainage can often be more appropriate than an oversized container.
Place the Succulent in the New Pot
Once the roots have been inspected, place the succulent into the prepared container.
Position it so the plant sits at roughly the same depth as before.
Then gradually add fresh growing medium around the root system.
Do not press the soil down aggressively.
Instead, gently settle the growing medium around the roots so the plant is stable without compacting the soil excessively.
Make sure the lower leaves are not buried beneath the growing medium.
If leaves remain in constant contact with damp soil, they may be more likely to develop problems.
Once the pot is filled, check the plant from several angles.
It should sit upright and feel stable.
If the succulent is leaning, adjust the root position or add a small amount of soil rather than forcing the stem into place.

Should You Water a Succulent Immediately After Repotting?
This is an area where your approach should depend on the condition of the roots and the plant.
If you have significantly disturbed or cut roots, giving damaged areas time to dry can be helpful before normal watering resumes.
If the root system is healthy and the repotting process was gentle, follow the needs of the particular succulent and the condition of the growing medium.
The most important principle is to avoid keeping the freshly repotted plant in constantly wet soil.
Succulents are adapted to periods of drying, and consistently wet conditions can increase the risk of root problems.
After watering, excess water should be able to drain freely from the bottom of the container.
Give the Plant Time to Adjust
Repotting is a form of stress for a plant, even when everything goes perfectly.
Do not expect your succulent to show dramatic new growth immediately.
For the first several days and weeks, focus on stable conditions rather than trying to make the plant grow faster.
Place it somewhere with appropriate light and good airflow.
Avoid making several major changes at once.
For example, if you have just repotted a succulent that was growing indoors, moving it directly into intense outdoor sunlight at the same time can create additional stress.
If you need to increase its sunlight exposure, do so gradually.
Watch the plant for signs of stress and adjust its environment when necessary.
Common Repotting Mistakes to Avoid
Repotting succulents becomes much easier when you know which mistakes to avoid.
Mistake 1: Pulling the plant by the leaves
Succulent leaves can detach easily, and pulling on the plant can damage the stem or root system.
Instead, support the plant and loosen the container around the root ball.
Mistake 2: Using a pot that is much too large
A large container can hold excess moisture for longer.
Choose a container that is appropriately sized for the root system rather than automatically choosing the largest pot available.
Mistake 3: Using heavy soil
Dense soil can retain too much moisture and reduce drainage.
Choose a growing medium that is appropriate for succulents and containers.
Mistake 4: Removing too many roots
Not every root needs to be cut or cleaned away.
Remove damaged or unhealthy roots when necessary, but preserve healthy roots whenever possible.
Mistake 5: Burying the succulent too deeply
Avoid covering the stem or lower leaves with too much soil.
Keep the plant positioned at an appropriate depth.
Mistake 6: Watering excessively after repotting
More water does not necessarily mean faster recovery.
Allow the growing medium and plant condition to guide your watering decisions.
Mistake 7: Changing the light too dramatically
Repotting and sudden exposure to intense sunlight at the same time can be unnecessarily stressful.
Keep the plant in suitable light and acclimate gradually when increasing sun exposure.
How Often Should You Repot Succulents?
There is no universal repotting schedule for every succulent.
Some plants can remain in the same container for years if they are healthy, stable, and growing well.
Instead of repotting simply because a certain amount of time has passed, look for practical signs that the plant or its growing medium needs attention.
Consider repotting when the roots have become crowded, the soil is no longer draining properly, the plant has outgrown its container, or the container has become unstable.
This approach avoids unnecessary disturbance while still giving the plant a fresh environment when it actually needs one.
What to Do With Old Soil Around the Roots
You do not always need to remove every bit of old soil from a succulent's roots.
If the old growing medium is loose and healthy, gently removing excess soil may be enough.
If the soil has become compacted, stays wet for an unusually long time, or shows signs of poor drainage, replacing more of it may make sense.
The goal is to give the roots access to fresh, well-draining growing medium without aggressively disturbing them.
Think of repotting as a careful reset rather than a deep cleaning process.
A Simple Step-by-Step Succulent Repotting Routine
If you want a quick checklist, use this process:
-
Choose a slightly larger pot with a drainage hole.
-
Prepare a well-draining succulent growing medium.
-
Gently loosen the old container.
-
Support the plant and carefully remove the root ball.
-
Inspect the roots for obvious damage or unhealthy tissue.
-
Gently loosen tightly packed roots if necessary.
-
Trim only damaged or unhealthy roots with clean tools.
-
Place the succulent at an appropriate depth in the new pot.
-
Fill around the roots with fresh growing medium.
-
Avoid aggressively compacting the soil.
-
Place the plant in suitable light and airflow.
-
Adjust watering based on the plant, soil, season, and growing conditions.
-
Give the succulent time to settle before making additional major changes.
Final Thoughts
Learning how to repot succulents without damaging their roots is mostly about slowing down and avoiding unnecessary force.
Choose an appropriately sized pot, use a well-draining growing medium, support the plant carefully, and take time to inspect the roots instead of pulling the succulent out quickly.
You also do not need to repot every succulent on a fixed schedule. If a plant is healthy, stable, and growing well in its current container, leaving it undisturbed may be the best option.
When repotting is necessary, focus on creating a healthy environment for the roots rather than simply giving the plant a larger home.
And remember that repotting is only one part of successful succulent care. Light, watering, drainage, and airflow all work together.
If you are deciding where to place your freshly repotted succulent, understanding its light requirements is an important next step. The right amount of sunlight can help support compact, healthy growth and reduce problems associated with insufficient or excessive light.
With gentle handling and the right growing conditions, repotting can be a simple way to refresh your succulent's growing environment while protecting the roots that keep your plant healthy.