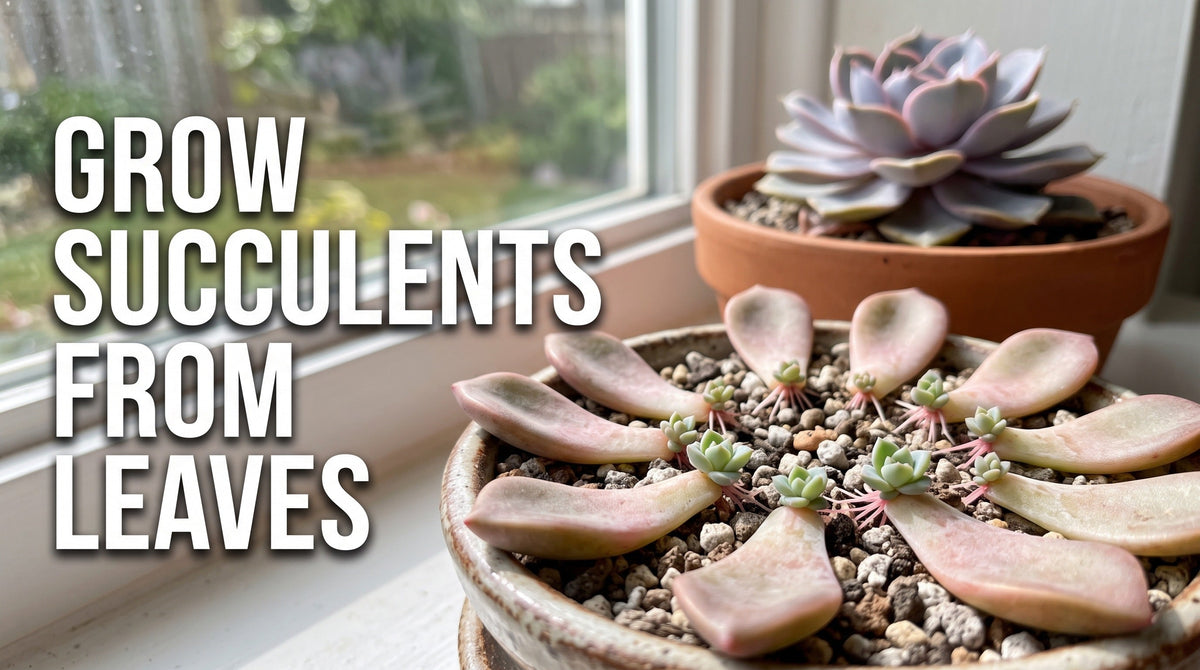
How to Propagate Succulents from Leaves: Step-by-Step Guide
Propagating succulents from leaves is one of the most fascinating ways to create new plants from an existing succulent. Instead of buying another plant, you can sometimes use a healthy leaf to grow new roots and eventually produce a tiny new succulent.
The process is simple, but success depends on choosing the right plant, removing the leaf correctly, using a well-draining growing medium, and avoiding too much moisture.
Succulent leaf propagation works particularly well with certain plants such as Echeveria, Crassula, Graptopetalum, Pachyphytum, Sedum, and some Kalanchoe. However, not every succulent can be propagated successfully from a leaf, so it is important to know your plant before you begin.
In this beginner-friendly guide, you will learn exactly how to propagate succulents from leaves, from choosing the right leaf to caring for the tiny roots and new plantlets that eventually appear.
What Is Succulent Leaf Propagation?
Succulent leaf propagation is a form of vegetative propagation in which a healthy leaf is removed from the parent plant and encouraged to produce roots and new growth.
Unlike growing succulents from seeds, leaf propagation creates a new plant from part of the existing plant.
The process usually looks like this:
Healthy leaf → callus → roots → tiny new growth → young succulent
The important part is that the leaf needs to be removed properly. Iowa State University Extension notes that the entire leaf should be cleanly separated from the stem, including the cells where the leaf attaches to the stem. Those cells contain the growing tissue needed for successful propagation.
Not every leaf will succeed, and that is completely normal. Some leaves may dry out, rot, or simply fail to produce new growth.
Which Succulents Can Be Propagated from Leaves?
Leaf propagation is most commonly associated with succulents that have thick, fleshy leaves.
Good candidates include:
• Echeveria
• Crassula
• Graptopetalum
• Pachyphytum
• Sedum
• Some Kalanchoe
RHS also identifies Echeveria, Crassula, and Kalanchoe among succulents that can be successfully propagated from leaf cuttings.
Some succulents are better propagated using stem cuttings, offsets, or division instead. The growth habit of the plant should guide your propagation method.
Before removing dozens of leaves from a favorite plant, it is a good idea to test a few leaves first.
What You Need for Leaf Propagation
You do not need expensive equipment.
Prepare:
• A healthy succulent
• Several healthy leaves
• A clean tray or shallow container
• Well-draining cactus or succulent growing medium
• A clean surface
• A spray bottle
• Bright, indirect light
• A small pot for the young plant later
A clean working area is helpful because propagation material can be vulnerable to rot and contamination. RHS recommends using clean tools and equipment when collecting propagation material.
Step 1: Choose a Healthy Parent Plant
Start with a healthy succulent.
Look for a plant with firm leaves, normal coloration, and active growth. Avoid taking propagation material from leaves that are already damaged, diseased, severely dehydrated, or affected by pests.
A strong parent plant gives you better propagation material and allows you to experiment without putting unnecessary stress on a struggling succulent.
If your plant is currently suffering from severe root problems or pest damage, it is usually better to address those issues first.
Step 2: Choose the Right Leaves
Select mature, healthy leaves from the lower or middle portion of the plant.
Look for leaves that are:
• Firm
• Full
• Undamaged
• Free from visible pests
• Free from soft or rotting areas
• Fully developed
Avoid leaves that are extremely young, shriveled, broken, or partially damaged.
One of the most important details is the base of the leaf.
The part that attaches to the stem needs to come away cleanly because successful leaf propagation depends on the tissue at that attachment point.

Step 3: Remove the Leaf Carefully
This is the most important step.
Hold the succulent gently near the leaf you want to remove. Wiggle the leaf from side to side with a small, controlled movement until it separates from the stem.
The goal is to remove the entire leaf rather than breaking off only the tip or leaving part of the leaf behind.
A cleanly removed leaf should have a smooth-looking base where it was attached to the stem.
Do not twist aggressively or pull so hard that you damage the parent plant.
If the leaf breaks in half, it is better to set that damaged piece aside rather than relying on it for propagation.
Iowa State Extension specifically notes that partial leaf pieces generally will not root for the succulent species commonly propagated by whole leaves.
Step 4: Let the Leaf Callus
After removing the leaves, place them on a clean, dry surface.
Do not immediately bury the leaves in wet soil.
Allow the freshly detached ends to dry and form a callus. This helps reduce the risk of rot before roots develop.
RHS recommends allowing succulent leaf cuttings to callus for about a day or two before potting, while its broader succulent guide notes that callusing time can vary from about a day to a week depending on the plant and conditions.
There is no need to rush this step.
A dry, clean tray in a bright area away from harsh direct sunlight works well.
Step 5: Prepare a Well-Draining Growing Medium
Succulent leaf cuttings need a growing medium that drains well.
A cactus or succulent propagation mix is a convenient option. You can also use a suitable gritty, well-draining propagation medium.
The goal is to avoid keeping the leaves sitting in constantly wet material.
RHS recommends free-draining compost for leaf cuttings and specifically suggests a gritty mix for succulent propagation.
Fill a shallow tray or container with the growing medium and make sure excess water can drain away.
Do not use a container that has no drainage unless you have a very specific propagation setup and understand how to control moisture.
Step 6: Place the Leaves on the Soil
Once the leaf has callused, place it horizontally on top of the growing medium.
The end that was attached to the stem should rest near the surface.
Do not bury the entire leaf.
Iowa State Extension recommends laying succulent leaves flat on slightly damp, well-drained rooting media and keeping the attachment end at the soil surface rather than covering it.
You can arrange several leaves in one shallow tray as long as they have enough space for emerging roots and new growth.
Label different varieties if you are propagating several types at the same time.
Step 7: Give the Leaves the Right Amount of Light
Place the propagation tray in a bright location with good light, but protect the leaves from intense direct sunlight while they are getting established.
Too much harsh sun can stress the exposed propagation material.
On the other hand, very low light can slow development.
A bright windowsill with filtered light or a bright indoor location can work well.
The ideal light level depends on the species and your growing environment, so watch the leaves rather than following a rigid schedule.
Step 8: Keep the Growing Medium Slightly Moist
Watering is where many beginners make mistakes.
A succulent leaf does not need to sit in wet soil.
The growing medium should be lightly moist rather than saturated.
Iowa State Extension recommends keeping the surface damp but not wet, and notes that a spray bottle can help moisten the surface without adding too much water.
Instead of soaking the entire tray, use small amounts of water when the surface begins to dry.
If the leaves become soft, translucent, or start turning mushy, excessive moisture may be a problem.
If the propagation environment stays constantly wet, rot can develop before roots have a chance to form.
Step 9: Wait for Roots to Appear
Now comes the part that requires the most patience.
New roots and tiny leaves may begin developing after several weeks, although timing varies by species and growing conditions. Iowa State Extension notes that new roots and leaves or rosettes can form in several weeks.
Do not dig up the leaves every few days to check for roots.
Repeatedly disturbing them can interrupt the process.
Instead, watch for visible changes.
You may first notice:
• Small pink, white, or pale roots
• Tiny bumps at the base
• A small green or reddish rosette
• Gradual development of new leaves
The original leaf may continue supplying stored resources to the developing plantlet.

Step 10: Let the Baby Succulent Develop
Once roots and new growth appear, continue providing bright light and careful moisture.
The tiny plant may look surprisingly small at first.
This is normal.
Do not rush to transplant it immediately. Allow the new growth to become more established before moving it.
Over time, the young succulent will begin to look more like a miniature version of the parent plant.
What Should You Do If Roots Appear but No Leaves?
This is not necessarily a problem.
Sometimes roots develop before visible leaves appear.
Continue providing appropriate light and careful moisture while giving the cutting time to develop.
Avoid pulling the leaf out of the soil to check whether the roots are growing.
Propagation is not always perfectly synchronized. Different leaves can develop at different speeds even when they came from the same parent plant.
What If a Leaf Starts to Shrivel?
A propagating leaf can gradually lose moisture as the new plant develops.
Some shriveling can be normal.
The important thing is to look for signs of active new growth.
If the leaf is slowly drying while a healthy root system or baby plantlet is developing, the process may still be progressing normally.
However, if the leaf becomes dark, translucent, mushy, or develops a foul smell, rot may be developing.
Remove severely rotting material so it does not remain in the propagation tray.
Common Mistakes When Propagating Succulents from Leaves
Using Broken Leaves
A leaf that breaks away from the plant without its attachment base may not have the tissue needed for successful propagation.
Choose complete leaves that separate cleanly from the stem.
Using Too Much Water
This is one of the most common problems.
Succulent propagation requires moisture, but constantly wet soil can create conditions for rot.
Keep the medium lightly moist rather than saturated.
Burying the Whole Leaf
The leaf should generally rest on top of the growing medium rather than being buried.
The attachment end should remain at the surface so roots and new growth can develop properly.
Using Heavy Soil
Dense soil can retain too much moisture around the propagation material.
Choose a well-draining succulent or cactus medium instead.
Giving Too Much Direct Sun
Fresh propagation material can be more vulnerable to harsh sunlight.
Start with bright, indirect or filtered light and adjust according to the plant's response.
Checking for Roots Too Often
It can be tempting to lift the leaf every few days.
Try not to.
Give the propagation process time to develop naturally.
Expecting Every Leaf to Work
Not every leaf will produce a new plant.
Some will dry out, some may rot, and some simply will not develop roots.
That does not necessarily mean you did something wrong.
Propagation success varies by species, leaf quality, timing, and growing conditions.
When Is the Best Time to Propagate Succulents from Leaves?
Many succulent propagation projects are easiest when the plant is actively growing.
RHS lists spring to early summer as a favorable period for leaf cuttings, although some plants can be propagated at other times depending on the species and growing conditions.
For indoor succulents, stable temperatures and adequate light can make propagation possible outside the traditional outdoor growing season.
Instead of relying only on the calendar, consider:
• Light levels
• Temperature
• Plant growth activity
• Humidity
• Your succulent species
A healthy plant growing actively is generally a better source of propagation material than a plant under significant environmental stress.
How Long Does It Take to Propagate Succulents from Leaves?
There is no universal timeline.
Some leaves begin producing roots relatively quickly, while others take longer.
Several weeks is a reasonable expectation for visible roots or new growth in suitable conditions, but the exact timing depends on the succulent species and environment.
Factors that influence the process include:
• Species
• Temperature
• Light
• Leaf health
• Growing medium
• Moisture level
• Season
Patience is one of the most important tools in succulent propagation.
When Should You Transplant the New Succulent?
Avoid moving the plantlet too early.
Once the young succulent has developed visible roots and a more established rosette, it can eventually be moved into its own small container.
Handle the new roots gently.
Use a small pot with a drainage hole and a well-draining succulent growing medium.
Do not immediately place the tiny plant into a very large pot.
A smaller container makes it easier to manage moisture while the young root system develops.

Leaf Propagation vs. Stem Cuttings
Leaf propagation and stem propagation are both useful techniques, but they are not interchangeable.
Leaf propagation uses a complete leaf and is especially useful for suitable rosette-forming or fleshy-leaved succulents.
Stem propagation uses a section of stem and can be more appropriate for branching or elongated succulents.
If your succulent has a long or leggy stem, stem propagation may be a more practical option than removing individual leaves.
For a separate step-by-step method, see our guide on how to propagate succulents from stem cuttings.
This internal link gives readers a natural next step without making the two articles compete for exactly the same search intent.
How to Care for the Parent Succulent After Taking Leaves
Removing a few healthy leaves should not normally be a major issue for a healthy established succulent.
Still, avoid stripping a large portion of the plant at once.
After propagation, return the parent plant to its normal growing conditions.
Provide appropriate light, use well-draining soil, and water according to the plant's needs.
If you notice that the parent plant is already stressed, diseased, or severely dehydrated, allow it to recover before taking more propagation material.
How to Increase Your Chances of Success
If you want to experiment with leaf propagation, start with several leaves rather than relying on just one.
Choose healthy, fully developed leaves.
Remove them carefully.
Let the ends callus before placing them on the growing medium.
Use a well-draining propagation mix.
Provide bright but gentle light.
Keep the surface lightly moist without making it soggy.
Then give the leaves time.
Propagation is partly a gardening experiment. Even when you follow the same steps, individual leaves may behave differently.
Final Thoughts
Learning how to propagate succulents from leaves can be a rewarding way to expand your collection without purchasing new plants.
The process is simple: choose a healthy leaf, remove it cleanly, allow it to callus, place it on well-draining growing medium, provide appropriate light and gentle moisture, and wait for roots and new growth to appear.
The most important lesson is patience.
Not every leaf will become a new succulent, and different species can respond differently to leaf propagation. But with the right plant, healthy leaves, good drainage, and careful moisture management, leaf propagation can be an enjoyable and surprisingly simple project for beginners.
Once your new succulents become established, you can eventually move them into individual pots or use them in creative succulent arrangements around your home or garden.